
Pruning
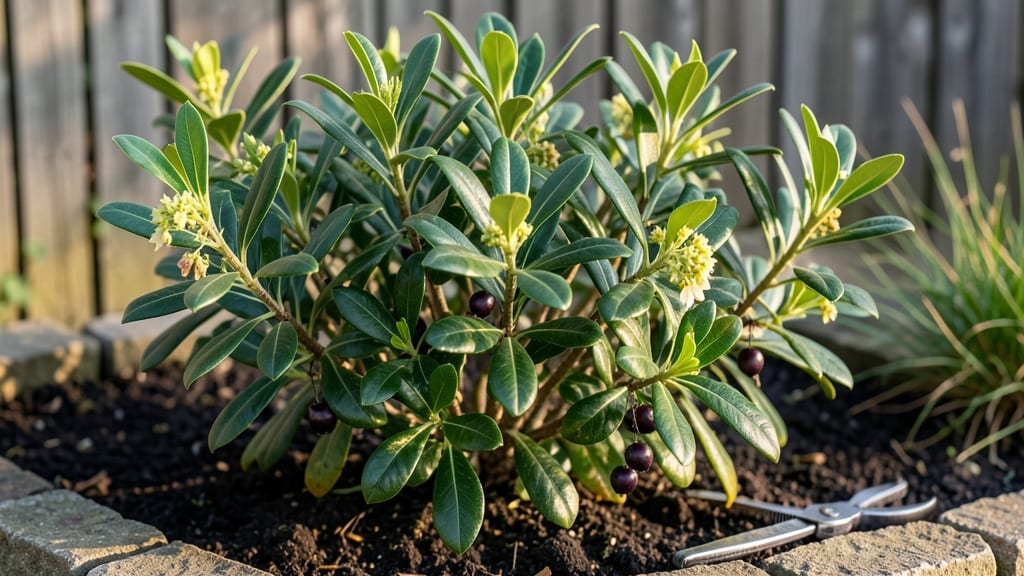
Transform your bay tree laurel into a year-round fragrant powerhouse with the right pruning approach. 🌿 I’ve learned that strategic cutting layers—done at the right times—keep these evergreens lush, bushy, and packed with that signature aroma.
The key isn’t just trimming; it’s understanding when to shape for growth or when to encourage dense foliage.
Most gardeners prune bay laurels once a year, but I’ve found that light shaping in late winter and a mid-summer trim unlocks the best results. You’ll need sharp pruners, a ladder (for taller trees), and about 30 minutes for a medium-sized shrub.
The goal is to remove dead wood first, then thin out crowded branches to let light and air circulate—this prevents those pesky brown spots on leaves.
After pruning, you’ll notice new growth within 4-6 weeks, and the fragrance becomes even more intense as the plant focuses its energy on fresh leaves. The best part? Your kitchen herbs and garden borders will smell like a Mediterranean grove all year.
Just avoid heavy pruning in fall, as the plant needs time to harden off before winter.
This method works for both container-grown bay laurels and those planted in the ground, making it perfect for patios, kitchen gardens, or as a fragrant hedge. Let’s get those shears ready—your bay tree’s next growth spurt starts now.
📚 In This Guide
- What you need
- Instructions
- Tips and common mistakes
- Wrapping up and next steps
What you need
- ● Pruning shears – Bypass pruners (sharp, 6–8" blades) for clean cuts on small branches.
- ● Loppers – Bypass or anvil type (8–10" blades) for thicker branches (½"–1.5" diameter).
- ● Pruning saw – Curved-tooth saw for branches >1.5" in diameter (avoid tearing bark!).
- ● Gloves – Heavy-duty, cut-resistant (bay laurels have sharp edges!).
- ● Disinfectant – 70% isopropyl alcohol or rubbing alcohol (to sterilize tools between cuts).
- ● Rag or paper towels – For wiping tools clean.
- ○ Bucket or trash bag – For collecting pruned branches (optional: compost if disease-free!).
- ● Hand pruners – For precision trimming of tiny stems.
- ● Extension pole – 10–12 ft with pruning head for high branches.
- ● Pruning sealant – Tree wound dressing (only if cutting large branches to prevent disease).
- ● Notebook & pen – To sketch your pruning plan before cutting!
- ● Safety glasses – If working near overhead branches.
How to prune bay laurel for lush, fragrant growth
Here's the method I swear by to keep your bay tree thriving—no guesswork, just results.
✂️ Step 1: Time Your Pruning for Best Results
Spring is the prime time to prune, right after new growth begins but before the tree flowers. This ensures you're cutting back just as the plant is waking up, ready to put energy into new branches. If you missed spring, late summer works too—just avoid pruning in fall or winter when the tree is dormant.
Look for the first flush of fresh, bright green leaves in early spring. That's your signal. I like to prune on a cloudy day or in the evening to reduce stress on the tree. The goal is to shape the tree while encouraging dense, fragrant foliage to grow back.
✂️ Step 2: Use the Right Tools and Technique
Grab your sharp pruning shears and clean them with rubbing alcohol before you start. Dull blades tear the bark, inviting disease. Cut just above a leaf node or bud at a 45-degree angle—this helps water run off the cut and prevents rot. Never leave stubs; they weaken the branch and look unsightly.
Start by removing any dead, diseased, or crossing branches first. These are easy to spot—they're brown, brittle, or growing inward. Next, thin out the interior to improve airflow. Bay laurels hate crowded branches, which can lead to fungal issues. Aim to remove about 20-30% of the total growth in one session.
☀️ Step 3: Shape for Airflow and Light
Bay laurels thrive when they get plenty of light and air circulation. Step back and visualize the tree’s shape—you want an open center that lets sunlight reach all the way to the trunk. Cut back any branches that are growing too close together or rubbing against each other.
For a bushier look, pinch back the tips of new growth by about one-third. This encourages the plant to branch out instead of growing tall and leggy. If your tree is getting too tall, you can also prune the top branches to promote fuller growth lower down. Just don’t cut more than one-third of the tree’s height at once—this can shock the plant.
🌿 Step 4: Post-Pruning Care for a Healthy Tree
After pruning, give your bay laurel a deep watering to help it recover. The roots need moisture to support the new growth you’ve encouraged. Avoid fertilizing right after pruning—wait until new growth appears, usually in 4-6 weeks. Too much fertilizer too soon can burn the freshly cut branches.
Keep an eye on the pruned areas for the first few weeks. If you see any signs of disease—like yellowing leaves or oozing sap—prune those spots immediately and treat with a fungicide if needed. Most bay laurels bounce back quickly, but a little extra care ensures they stay lush and fragrant.
⏰ Step 5: Maintain Year-Round with Light Trims
Don’t wait for spring to keep your bay laurel looking its best. Do light pruning sessions every 3-4 months to remove any stray branches or leaves that look tired. This keeps the tree dense and encourages continuous growth. Just avoid heavy pruning in late summer—you don’t want to stimulate new growth that won’t have time to harden off before winter.
Here’s the thing—bay laurels are forgiving, but they respond best to consistent care. A little attention now means you’ll enjoy that signature fragrance and glossy leaves for years. And trust me, there’s nothing like the scent of fresh bay leaves wafting through your garden!
Tips & tricks for perfect bay laurel pruning
Here's what nobody tells you about keeping your bay tree thriving—these are the secrets that'll transform your pruning game.
Timing is Everything: The spring timing in Step 1 is critical because that's when your bay laurel is naturally preparing for new growth. If you're working with a mature tree, you can actually do two light pruning sessions—once in early spring and again in late summer—without stressing it. Just remember to avoid any heavy cuts after late summer, as new growth won't have time to harden off before winter. I've seen trees completely revitalized by this two-phase approach!
Tool Technique: When you're making those 45-degree cuts in Step 2, here's a pro move: Wipe your pruning shears with rubbing alcohol between cuts on different branches. This prevents cross-contamination of any potential diseases from one branch to another. And for those stubborn branches, I've found that a small saw works better than shears—just be careful not to tear the bark. The key is always to cut cleanly just above a leaf node.
Visual Pruning Cues: In Step 3, when you're shaping for airflow, look for branches that are growing inward or crossing over others. These are the ones that need to go first—they're competing with each other for sunlight and nutrients. For the one-third pinch back on new growth, imagine you're giving the plant a little haircut—you want to leave enough to encourage bushiness but not so much that it looks ragged. The result should be a tree that looks fuller from all angles.
Post-Pruning Recovery: After your deep watering in Step 4, here's a trick I learned: Add a handful of compost to the soil around the base. This gives the tree an extra nutrient boost as it recovers. And that 4-6 week wait before fertilizing? Think of it as a healing period for your tree. I've seen trees that were struggling come back stronger after just one proper pruning session with this recovery care.
Pro Tips for Bay Tree Laurel
- Here's what nobody tells you about keeping your bay tree thriving—these are the secrets that'll transform your prunin...
- Timing is Everything: The spring timing in Step 1 is critical because that's when your bay laurel is naturally prepar...
- Tool Technique: When you're making those 45-degree cuts in Step 2, here's a pro move: Wipe your pruning shears with r...
Frequently asked questions
Got questions about keeping your bay tree laurel healthy and fragrant with the right pruning? Here are some common ones—and their answers!
When is the best time to prune a bay tree laurel?
The ideal time is late winter or early spring (just before new growth starts). This encourages vibrant foliage and maintains that signature bay laurel aroma. Avoid heavy pruning in fall—it can stress the plant before winter dormancy. Light shaping? Anytime is fine!
How much can I trim back my bay tree laurel?
For mature plants, you can safely remove up to 1/3 of the foliage in one go. Focus on dead, diseased, or overcrowded branches first. Never cut into old wood—bay laurels bloom on new growth. Pro tip: Step back and shape like a natural vase for airflow and sunlight!
What if my bay tree laurel isn’t growing after pruning?
Check these first:
- Light: Needs 6+ hours of sunlight daily.
- Water: Keep soil consistently moist (not soggy).
- Soil: Amend with compost if it’s poor-draining.
- Pests: Inspect for spider mites or scale (wipe with soapy water if found).
Can I propagate bay tree laurel from cuttings?
Take 4–6 inch cuttings from healthy stems (just below a leaf node). Dip in rooting hormone, plant in moist perlite/sand mix, and cover with a plastic bag to retain humidity. Keep in bright, indirect light—roots form in 4–8 weeks!
Are there alternatives to bay laurel for cooking if I don’t have a tree?
Yes! Dried bay leaves (from grocery stores) work in a pinch for soups and stews. For a similar flavor, try:
- Thyme or oregano (milder, earthy notes).
- Laurel cherries (young leaves from fresh bay trees).
- Marjoram (sweeter, but less robust).
Wrapping up and next steps
Mastering the art of bay tree laurel pruning isn’t just about keeping your plant tidy—it’s about unlocking its full potential for lush growth and intoxicating fragrance! 🌿 With the right tools, timing, and techniques, you can transform your bay tree into a year-round aromatic powerhouse.
Whether you’re trimming for shape, health, or harvest, remember: patience and precision are your best friends.
Ready to take the next step? Start by scheduling a quick seasonal pruning session—grab your shears and give your bay tree the love it deserves. And if you’re feeling ambitious, experiment with propagation using those pruned cuttings! Your green thumb (and your kitchen) will thank you. 🌱✨