
How To
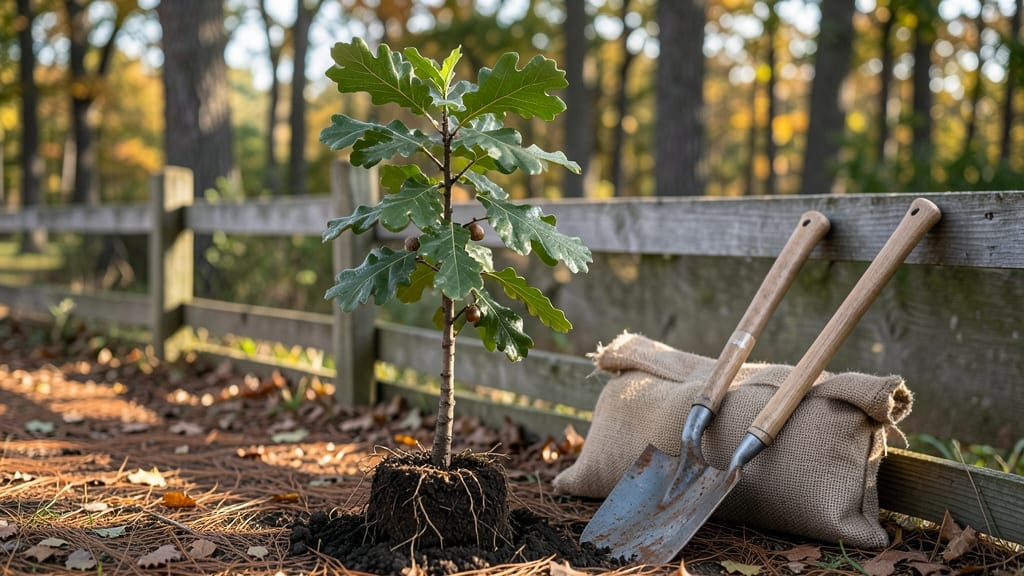
Transplanting trees from the woods means saving mature specimens instead of buying young ones—healthy roots are the key to success. 🌳 I’ve moved oak seedlings and maple saplings from my property’s wooded edge, and the secret lies in timing, root care, and minimizing stress during the move.
The right approach turns a risky gamble into a rewarding addition to your landscape.
Start by selecting trees in late fall or early spring when they’re dormant but still have moisture in the soil. You’ll need a sharp spade, burlap, rope, and a wheelbarrow—no fancy tools, just the right technique.
Dig a trench around the root ball, prune encircling roots, and wrap the roots in burlap to keep them intact. The goal is to replant within hours to avoid drying out.
📚 In This Guide
- What you need
- Instructions
- Tips and common mistakes
- Wrapping up and next steps
What you need
- ● Shovel or Spade: A sturdy digging tool (preferably a mattox or D-handled shovel) for excavating roots. (1-2 units, depending on tree size)
- ● Root Pruner or Saw: A pruning saw or root saw for trimming tangled roots. (1 unit)
- ● Burlap or Tree Sack: Heavy-duty landscape fabric (3–4 ft wide) to wrap roots and protect them during transport. (1 roll, ~20 ft)
- ● Twine or Rope: Jute twine (1/2-inch wide) to secure the burlap. (1 spool)
- ● Wheelbarrow or Dolly: For hauling soil and the tree. (1 unit)
- ● Garden Hose or Watering Can: With a spray nozzle for post-transplant hydration. (1 unit)
- ● Mulch: Shredded bark or pine straw (2–3 inches deep) to retain moisture. (1–2 bags, ~50 sq ft coverage)
- ○ Staking Supplies (Optional but Recommended): Tree stakes (2–4 units, 6–8 ft tall)
- ● Soft tree ties (1–2 rolls)
- ● Root Stimulator: A mycorrhizal inoculant or rooting hormone gel to encourage growth. (1 bottle)
- ● Soil Amendments: Compost or peat moss to improve planting soil. (1–2 bags)
- ● Gloves & Safety Gear: Work gloves, knee pads, and safety goggles for protection. (1 pair each)
- ● Tarps or Plastic Sheeting: To shield the tree from sun/rain during transport. (1–2 sheets)
- ● Measuring Tape: For marking planting depth and spacing. (1 unit)
Step-by-Step guide for moving wild trees safely
Here’s how to relocate woodland trees while keeping their roots strong and resilient.
🪴 Step 1: Choose the Right Season and Prepare the New Site
Timing matters most—transplant during late fall or early spring when trees are dormant. Avoid summer heat or winter freezes, which stress roots. Pick a spot with similar soil conditions and sunlight exposure to where the tree grew in the wild. Dig the new hole twice as wide as the root ball but only as deep as the existing root system—never deeper, or the tree will suffocate.
Test the soil by squeezing a handful. If it crumbles easily, it’s loose enough for roots. If it stays clumped, amend with 2 inches of compost mixed into the bottom of the hole. This mimics the tree’s natural environment and gives roots a nutrient boost right away. Mark the hole’s center with a stake so you know where to place the root ball later.
🌿 Step 2: Dig Around the Tree Carefully to Preserve Roots
Start digging 12–18 inches away from the trunk in a wide circle, using a sharp spade to avoid tearing roots. Work slowly—this isn’t a race. Cut roots only if they’re encircling the trunk (a common issue called "girdling"), and trim them cleanly with pruners. The goal is to keep as much of the root system intact as possible; even small roots help the tree recover.
Once you’ve dug a 6–8 inch deep trench around the tree, gently loosen the soil inside the circle with a fork. This prevents roots from snapping when you lift the tree. If the tree is large, consider burlapping the root ball—wrap it in burlap or landscape fabric to protect roots during transport. Avoid plastic, which can suffocate roots.
⏰ Step 3: Lift, Transport, and Plant the Tree Quickly
Dig underneath the root ball and slide a wide board or tarp under it to support the weight. Lift the tree straight up—no tilting—and keep the root ball level. If the tree is heavy, enlist help; dropping it risks breaking roots. Transport it immediately to the new site, keeping the root ball moist but not soggy. A damp towel over the roots helps retain moisture if the move takes longer than 30–45 minutes.
Lower the tree into the prepared hole, ensuring the top of the root ball sits 1–2 inches above ground level. This prevents soil from settling later and smothering the trunk. Backfill with the native soil you removed, tamping it down gently in 2-inch layers to eliminate air pockets. Water deeply after planting to settle the soil and remove any air gaps around the roots.
💧 Step 4: Water and Mulch for Recovery
Give the tree 1–2 gallons of water per inch of trunk diameter immediately after planting. For example, a 4-inch diameter tree needs 4–8 gallons to soak the root zone thoroughly. Check soil moisture 2–3 inches deep—if it’s dry, water again. Overwatering now is worse than underwatering; roots need time to establish before they can absorb excess moisture.
Spread 3–4 inches of mulch (wood chips or straw) over the soil surface, keeping it 6 inches away from the trunk to prevent rot. Mulch conserves moisture and regulates soil temperature, which is critical for young roots. Replenish mulch as it breaks down, but never pile it higher than 3 inches—too much suffocates roots and attracts pests.
Tips & tricks for transplanting trees safely
Real talk: Moving trees from the wild isn't just about digging and planting—it's about giving them the best shot at survival. Here's what nobody tells you about keeping those roots happy through the process.
Seasonal Timing is Everything: Late fall or early spring isn't just a suggestion—it's when trees are dormant and can handle the stress. I've seen trees transplanted in summer wilt within weeks because the heat dries out roots before they can establish. If you absolutely must move in summer, do it on a cloudy day and water heavily before and after transplanting. The 45-minute window for transport in Step 3 becomes even more critical during hot weather—roots dry out fast.
Root Ball Protection Pays Off: That burlap wrap in Step 2 isn't just for show—it's what keeps delicate roots from tearing during transport. I learned this the hard way after watching a $200 tree's roots shred when I used plastic sheeting instead. For large trees, consider adding a layer of damp burlap around the root ball before wrapping with the fabric. This creates a moisture barrier that can make the difference between survival and failure during those critical first weeks.
Soil Preparation Secrets: The 2 inches of compost in Step 1 should be mixed into the bottom of the hole, not just dumped in. Think of it like creating a nutrient-rich foundation for your tree's roots to settle into. I've found that adding a handful of mycorrhizal fungi powder (available at garden centers) to this compost mix gives roots an extra boost—these beneficial fungi help roots absorb water and nutrients more efficiently. It's an optional upgrade, but worth it for high-value trees.
Watering Wisdom: That 1-2 gallons per inch of trunk diameter in Step 4 is your minimum, not maximum. I've seen trees establish better when given an extra 50% more water during the first month after transplanting. The key is deep watering—aim for 6-8 inches deep, not just surface moisture. Use a soil probe or long screwdriver to check moisture levels at that depth before deciding whether to water again. This prevents shallow root systems that struggle during dry spells.
Pro Tips for Transplant Trees From Woods
- Real talk: Moving trees from the wild isn't just about digging and planting—it's about giving them the best shot at s...
- Seasonal Timing is Everything: Late fall or early spring isn't just a suggestion—it's when trees are dormant and can ...
- Root Ball Protection Pays Off: That burlap wrap in Step 2 isn't just for show—it's what keeps delicate roots from tea...
Frequently asked questions
Got questions about transplanting trees from the woods? You’re not alone—this process can feel tricky! Below, we’ve answered the most common questions to help you navigate the job with confidence. Whether you’re a beginner or just need a quick refresher, these insights will keep your trees thriving.
What’s the best time of year to transplant trees from the woods?
The ideal window is early spring or fall when temperatures are mild, and trees are dormant but not frozen. Avoid transplanting during extreme heat, drought, or winter—roots struggle to establish in harsh conditions. For deciduous trees, aim for late autumn (after leaves fall) or early spring (before buds swell). Evergreens tolerate transplanting slightly later in fall but avoid late spring.
How do I know if a tree is healthy enough to transplant?
Look for these signs: vibrant foliage, firm bark (no cracks or peeling), and active root growth (white or light-colored roots, not brown/mushy). Avoid trees with yellowing leaves, dead branches, or root rot (smelly, slimy roots). If the tree is young (under 10 years) and small (<10 feet tall), it’s a better candidate than mature giants.
Can I transplant a tree without digging up its entire root ball?
Yes! For smaller trees, use the “root pruning” method: gradually trim roots over 1–2 seasons before transplanting to reduce shock. For larger trees, hire a pro—they’ll use air spades or root saws to minimize damage. If DIY-ing, never remove more than 20–30% of roots at once, and water deeply before and after transplanting.
What should I do if my transplanted tree’s leaves turn brown or wilt?
Brown/wilted leaves often signal transplant shock or underwatering. First, check the soil moisture—stick your finger 2 inches deep; if dry, water deeply. Mulch the base (but keep it 3 inches away from the trunk) to retain moisture. If leaves crisp and fall off, it may be root damage—trim any dead branches and avoid fertilizing for 6–8 weeks.
Are there any trees I should never try to transplant?
Some trees are high-maintenance or high-risk for transplanting. Avoid:
- Mature oak, maple, or walnut trees (aggressive roots, slow recovery).
- Black willows or poplars (weak wood, prone to breakage).
- Trees with invasive root systems (e.g., Bradford pear, Russian olive)—they may harm your landscape.
Wrapping up and next steps
Transplanting trees from the woods may seem daunting, but with the right timing, tools, and care, you can give your new greenery a thriving start. Remember, patience and preparation are key—whether you’re relocating a sapling or a mature tree, healthy roots and seasonal awareness make all the difference.
Now that you’re equipped with the know-how, take the next step: mark your calendar for the ideal transplanting window and gather your supplies. Your future shade, fruit, or beauty awaits—so roll up your sleeves and get growing! 🌱✨