
Trees
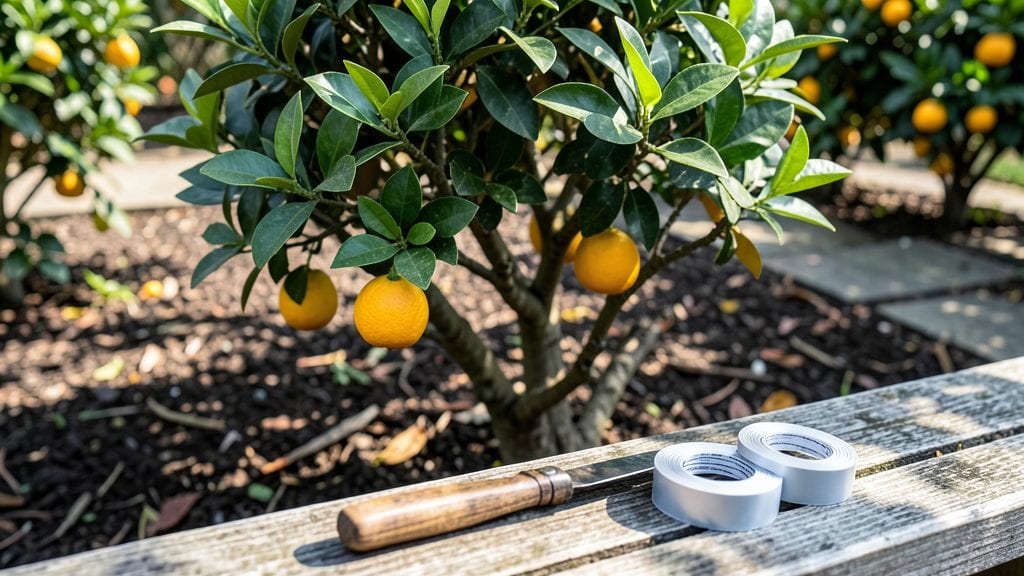
Grafting tangerine trees ensures you get the exact variety you love while leveraging hardy rootstock for stronger growth. ✨ I’ve grafted dozens of citrus trees, and the key lies in matching scion and rootstock at the right time—spring or early summer—when both are actively growing.
The whip-and-tongue method is my go-to for clean unions, but cleft grafting works for thicker rootstock when scions are scarce.
You’ll need sharp grafting tools—a clean razor blade for cuts, grafting tape, and a humidity dome to protect the union. Rootstock selection matters too: choose disease-resistant varieties like trifoliate orange for cold tolerance or sour orange for compatibility.
Most gardeners overlook wound sealing with grafting wax, but it prevents dehydration and rot—critical for citrus, which dries out fast.
Success shows up in 4-6 weeks with new shoots emerging from the graft line, but fruit won’t appear for 2-3 years. Patience pays off: a well-grafted tangerine tree produces sweeter, more abundant fruit than seed-grown ones. The first harvest is worth every careful cut and watchful watering.
This technique works for backyard growers in zones 8-11, though container culture extends it to cooler climates. Start small with one tree to master the process—then expand your citrus orchard with confidence. The precision is rewarding, and the payoff is worth every careful step.
📚 In This Guide
- What you need
- Instructions
- Tips and common mistakes
- Wrapping up and next steps
What you need
- ● Scion Wood: 1-3 healthy, disease-free tangerine tree scions (1/4" to 1/2" in diameter, 4-6 inches long)
- ● Collected in late winter or early spring (dormant season) for best results
- ● Rootstock: 1-2 young, vigorous rootstock seedlings (trifoliate orange or sour orange are ideal)
- ● Rootstock should be 1/4" to 1/2" in diameter at the grafting point
- ● Grafting Tools: Sharp grafting knife or pruning shears (sterilized with rubbing alcohol)
- ● Grafting tape or rubber bands (1-2 per graft)
- ○ Sealing Compound (Optional but Recommended): Pruning sealant (e.g., Tree Seal Tape) to prevent disease entry
- ○ Grafting Clamp or Parafilm (Optional): For extra security, especially for whip-and-tongue grafts
- ● A clean, well-lit workspace (outdoors or indoors with good airflow)
- ● Access to water for cleaning tools and hydrating rootstock
- ● Grafting performed on a cool, cloudy day (60-70°F ideal) to reduce stress on the tree
- ● Disinfect all tools with rubbing alcohol or a bleach solution (1 part bleach to 9 parts water) before starting
Step-by-Step instructions for grafting tangerine trees
Here’s the method I’ve refined over years of citrus grafting—clean cuts, perfect alignment, and a union that holds.
🪴 Step 1: Prepare the Rootstock and Scion Wood
Select a healthy, disease-free rootstock with a 4-6 inch diameter trunk, preferably a cold-hardy citrus variety like trifoliate orange. Prune the rootstock 2-3 inches above the graft union height—this ensures a clean surface for the scion. The scion should be pencil-thick (about ¼ inch diameter) and freshly cut from a dormant or semi-dormant branch, ideally from a tangerine tree of the variety you’re grafting.
Use a sharp grafting knife to make clean, 45-degree slanting cuts on both the rootstock and scion. The cambium layer (the green, growth-producing layer just under the bark) must align perfectly—this is where the union forms. If the scion is too mature, it won’t take; if too young, it’ll dry out before bonding. Test the scion’s readiness by gently bending it—it should snap cleanly, not tear.
✂️ Step 2: Make the Graft Cuts and Fit
On the rootstock, slice 1-2 inches deep into the bark, stopping just before the pith (the spongy center). The cut should expose the cambium layer in a long, smooth arc. For the scion, make a matching 45-degree cut on one end, ensuring the cambium layers align when the two are joined. This is the moment that matters: the scion’s cambium must touch the rootstock’s cambium along the entire length of the cut.
Slide the scion into the rootstock’s cut until the top of the scion aligns with the top of the rootstock’s cut. The fit should be snug but not forced—if it’s too tight, you’ll crush the cambium; if too loose, the graft won’t bond. Secure the union immediately with rafting tape or plastic grafting clips, wrapping tightly but not so much that it restricts growth. Leave the scion’s top exposed—it needs light to photosynthesize while the union forms.
💧 Step 3: Seal and Protect the Graft
Cover the entire graft union with grafting wax or sealing compound to prevent moisture loss and infection. Apply a thin, even layer, smoothing it over the tape or clips and extending it ½ inch above and below the union. This seal keeps the cambium hydrated while it knits together—without it, the graft dries out and fails. If you’re grafting in dry conditions, reapply the wax every 3-4 days until the union is fully set.
Place the grafted tree in a shaded, humid environment (like a greenhouse or under a plastic tent) to maintain 70-80% humidity for the first 4-6 weeks. Mist the leaves lightly daily to prevent stress, but avoid wetting the graft union directly—excess moisture here invites rot. You’ll know the graft is taking when new growth appears on the scion within 6-8 weeks. Until then, monitor for signs of stress like wilting or discoloration.
☀️ Step 4: Monitor and Transition to Outdoor Conditions
After 6 weeks, check the graft union by gently tugging the scion—if it resists, the union is strong. Remove the tape or clips and prune the rootstock flush with the graft to encourage the scion to take over. Gradually introduce the tree to full sun over 10-14 days, hardening it off by moving it outside for 1-2 hours daily before leaving it out permanently. This slow transition prevents shock and ensures the scion’s leaves acclimate to direct light.
Water deeply once a week during the first month after grafting, keeping the soil moist but not soggy. Overwatering now can drown the newly formed roots. You’ll see the first true sign of success when the scion’s leaves turn deep green and firm—this means the graft is fully integrated and the tree is ready for long-term care. Real talk: the first year is critical, so don’t rush the process.
Tips & tricks for perfect citrus grafting
A few precision techniques that'll transform your grafting success rate from luck to science.
Tool Precision in Step 1: Your grafting knife is the most critical tool—it should be razor-sharp to make clean 45-degree cuts without tearing the cambium. I've ruined more grafts than I can count using dull blades that crushed the bark. Test your knife by cutting through a piece of paper effortlessly; if it resists, sharpen it. The cambium layer is paper-thin, and even a slight nick can prevent successful union formation.
Scion Selection Strategy: When selecting your pencil-thick scion, look for branches with a diameter of about ¼ inch that bend slightly without breaking. I learned this the hard way after grafting overly mature scions that refused to take. The ideal scion should have a slight green tint to the bark, indicating it's in its prime growth phase. Collect scions in the morning when the bark is most pliable, and store them in a damp paper towel in a plastic bag until you're ready to graft.
Humidity Control in Step 3: Maintaining 70-80% humidity for the first 4-6 weeks is non-negotiable. I've seen grafts fail spectacularly when humidity dropped below 60%—the cambium dries out before it can properly fuse. If you don't have a greenhouse, create a humidity tent using clear plastic sheeting supported by a wire frame. Place a shallow tray of water underneath to increase moisture levels. Monitor humidity with a hygrometer; if it falls below 70%, mist the leaves more frequently or adjust your setup.
Graft Union Inspection: After the 6-week mark when you check the graft union, look for three key signs of success: first, the union should appear slightly swollen compared to the surrounding bark; second, the scion should feel firmly attached when you gently tug; and third, you'll notice new growth buds forming at the base of the scion. If you see any blackening or mushy areas, the graft has failed from rot—this usually means excess moisture at the union. Don't be discouraged; even experienced graftors have a 10-15% failure rate with their first attempts.
Pro Tips for Grafting Tangerine Trees
- A few precision techniques that'll transform your grafting success rate from luck to science.
- Tool Precision in Step 1: Your grafting knife is the most critical tool—it should be razor-sharp to make clean 45-deg...
- Scion Selection Strategy: When selecting your pencil-thick scion, look for branches with a diameter of about ¼ inch t...
Frequently asked questions
Got questions about grafting tangerine trees? You’re not alone!
Here are answers to the most common concerns—from timing to troubleshooting—to help you achieve a perfect union and bountiful harvests.
When is the best time of year to graft tangerine trees?
The ideal window is late winter to early spring (just before buds swell) or mid-summer (when growth is active). Avoid grafting during extreme heat, cold, or dormancy—these conditions stress the tree and reduce success rates. Pro tip: Morning grafts on cloudy days minimize sun stress on fresh cuts!
What’s the easiest grafting method for beginners?
Start with whip-and-tongue grafting—it’s beginner-friendly and works well for tangerine trees. This method involves slanted cuts (like puzzle pieces) on both the scion (tangerine) and rootstock, ensuring maximum contact for healing. Watch a YouTube tutorial first to visualize the technique!
How do I know if my graft is failing?
Signs of failure include wilting leaves, no new growth after 4–6 weeks, or cracking at the graft union. If the scion turns yellow or black, it’s likely dead. Check for moisture stress (keep soil damp but not soggy) and pest damage (aphids love tender grafts!).
Can I graft a tangerine onto a lemon or lime tree?
Yes! Tangerines graft well onto lemon, lime, or orange rootstock—just ensure the rootstock is healthy and compatible. However, avoid grafting onto grapefruit rootstock, as it can lead to poor compatibility or disease issues. Always use certified disease-free rootstock for best results.
Do I need to prune my tangerine tree after grafting?
Light pruning is key! Remove any competing shoots below the graft union to redirect energy to the scion. Use sterilized shears to cut at a 45° angle, and apply pruning sealant to prevent disease. Avoid heavy pruning—focus on shaping the tree after the graft takes hold (usually 6–12 months).
Wrapping up and next steps
Grafting tangerine trees is a rewarding skill that unlocks bigger harvests, disease resistance, and variety customization—but success hinges on patience, precision, and preparation.
By mastering the right techniques (like whip-and-tongue or cleft grafting) and timing (early spring or late winter), you’ll give your citrus union the best shot at thriving. Don’t let setbacks discourage you—even experienced growers face challenges, but each graft is a step toward a flourishing orchard!
Ready to put your new skills to work? Start small—graft a few trees this season, document your progress, and share your wins (or lessons!) with fellow citrus enthusiasts. The juiciest rewards come from hands-on practice, so grab those tools and get grafting! 🌱✨