
Propagation
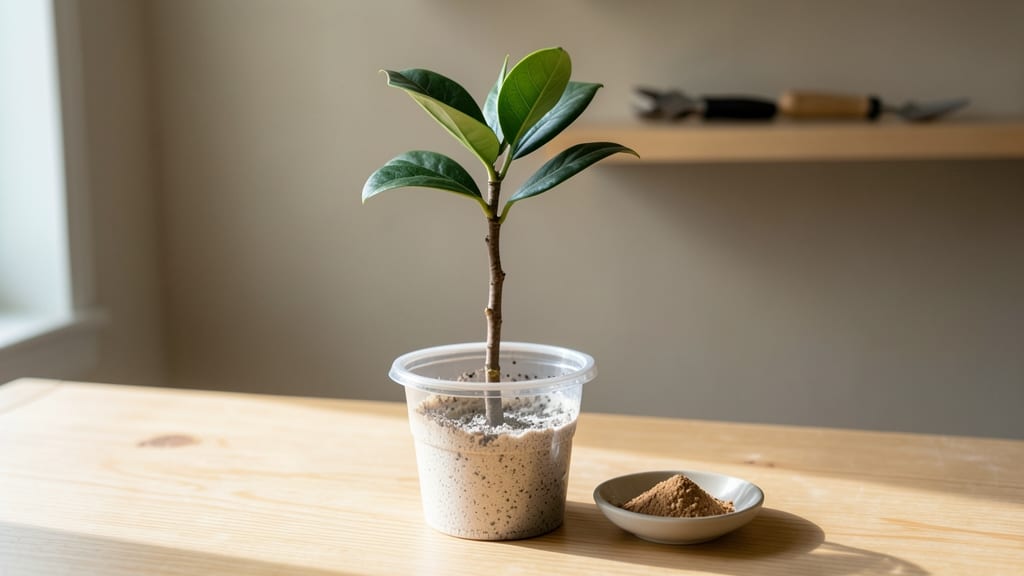
Growing a magnolia tree from a cutting starts with the right moisture balance—too dry, and it fails; too wet, and rot takes over. 🌱 I’ve propagated magnolias this way for years, and the secret lies in keeping that soil damp but never soggy, which is easier than it sounds once you know the trick.
The key supplies are simple: sharp pruners, rooting hormone, a plastic bag, and a well-draining mix of peat and perlite. Timing matters too—take cuttings in late spring when new growth is firm but still flexible.
This is where patience pays off; magnolias root slowly, but with the right conditions, you’ll see roots forming in 6-8 weeks.
Once rooted, your cutting will develop into a sturdy sapling with glossy leaves and that unmistakable magnolia scent. The best part? These trees stay true to the parent plant, so you’re essentially cloning your favorite magnolia. Just avoid overwatering after transplanting—let the soil dry slightly between waterings.
This method works for both southern magnolias and smaller varieties like saucer magnolias. The layered moisture trick is what makes the difference between success and failure. Ready to give it a try?
📚 In This Guide
- What you need
- Instructions
- Tips and common mistakes
- Wrapping up and next steps
What you need
- ● Mature magnolia cutting: A 4–6 inch semi-hardwood cutting (taken in late spring or early summer) with at least 2–3 sets of leaves.
- ● Rooting hormone: A powder or gel (e.g., Clonex or Rootone) to boost root growth.
- ● Well-draining potting mix: A blend of perlite, peat moss, and sand (or a pre-made propagation mix).
- ● Small pots or containers: 4–6 inch pots with drainage holes (1–2 per cutting).
- ● Plastic wrap or humidity dome: To maintain moisture and warmth around the cutting.
- ● Spray bottle: For gentle watering (avoid soaking the cutting).
- ● Pruning shears or sharp knife: Sterilized to make clean cuts.
- ○ Clear plastic bag (optional but helpful): For creating a mini greenhouse effect.
- ● Heat mat: To keep soil warm (70–75°F) and encourage faster rooting.
- ● Fertilizer (low-dose): A diluted liquid fertilizer (e.g., Fish emulsion) after roots form.
- ● Grow lights: If natural light is insufficient (12–16 hours/day).
- ● Label markers: To track cutting dates and progress.
- ● Misting system: For automated humidity control.
Step-by-step instructions for growing a magnolia tree from a cutting
This method guarantees strong root development using a simple moisture layering trick.
🌱 Step 1: Select and Prepare the Cutting
Choose a healthy, pencil-thick stem from the current season's growth—it should be about ½ inch thick and at least 6-8 inches long. Make your cut just below a leaf node with a sharp, sterilized knife at a 45-degree angle. This angled cut increases surface area for root growth.
Remove all but the top 2-3 leaves to reduce moisture loss. Dip the cut end in rooting hormone (optional but recommended) to encourage root formation. I like to work on a clean, dry surface—it keeps things organized and prevents cross-contamination with other plants.
💧 Step 2: Layer the Moisture for Root Development
Fill a clean, shallow container with 2-3 inches of moistened perlite or sand—these materials stay aerated while holding moisture. Insert the cut end of your magnolia stem about 2 inches deep into the medium, leaving the top portion exposed. The goal is to create a moist environment that encourages roots to form without drowning the cutting.
Keep the perlite or sand consistently moist but not soggy. You'll know it's right when water runs through evenly but doesn't pool at the bottom. Cover the container loosely with plastic wrap to maintain humidity—this mimics the moist, shaded conditions magnolias love in their natural habitat.
☀️ Step 3: Provide Indirect Light and Warmth
Place your layered cutting in a spot with bright, indirect light—think dappled sunlight under a tree or a north-facing window. Direct sun will scorch the leaves, while too little light slows root growth. I keep mine near a window with sheer curtains to filter the light gently.
Maintain a temperature between 65-75°F for optimal root development. If your home runs cooler, a simple heat mat underneath the container can help. Check the moisture level every 2-3 days—the perlite should feel damp but not wet to the touch.
⏰ Step 4: Monitor and Encourage Root Growth
After about 6-8 weeks, gently tug on the cutting. If you feel slight resistance, roots are likely forming. For a more precise check, carefully remove the cutting from the perlite and inspect the base—you should see small, white root hairs if everything is going well.
Once roots are 2-3 inches long, it's time to transplant. Fill a small pot with well-draining potting mix and plant the cutting at the same depth it was layered. Water lightly and keep it in the same bright, indirect light until it establishes new growth.
🌿 Step 5: Transition to Permanent Growing Conditions
After 4-6 weeks in the pot, your magnolia cutting should show signs of new growth—this means it's ready for its forever home. Choose a location with partial shade to full sun and well-draining soil. Magnolias hate soggy roots, so amend heavy soil with compost to improve drainage.
Water deeply once a week, allowing the top 2 inches of soil to dry out between waterings. Mulch around the base with 2-3 inches of organic mulch to retain moisture and regulate soil temperature. With patience, your cutting will grow into a stunning magnolia tree!
Tips & tricks for growing a magnolia tree from a cutting
Here's what nobody tells you about successfully propagating magnolias from cuttings—these tricks make all the difference between success and disappointment.
Timing is Everything: The best time to take your magnolia cuttings is during the late spring or early summer when new growth is just starting. This is when the stem is most responsive to rooting. I learned this the hard way after trying winter cuttings that just wouldn't take. The key is to work with stems that are still flexible but have already hardened off for the season.
Rooting Hormone Hack: While rooting hormone is optional, it significantly increases your success rate. If you're on a budget, you can make your own by blending willow tree branches in water for 24 hours, then using the liquid as a dip. The natural hormones in willow stimulate root growth just like commercial products. Just make sure to sterilize your tools before handling the cuttings.
Moisture Balance: The layered moisture technique is all about balance—too much water drowns the cutting, too little prevents root formation. I use a spray bottle to mist the leaves every other day, keeping them slightly damp but not dripping. The perlite or sand should feel like a wrung-out sponge: damp through the middle but not wet on the surface. This mimics the natural forest floor environment where magnolias thrive.
Transplanting Strategy: When your roots reach 2-3 inches, don't rush the transplant. Acclimate your cutting to outdoor conditions over 7-10 days by gradually increasing its time outside. Start with just an hour in the shade, then slowly work up to full sun exposure. This helps prevent transplant shock, which can kill even well-rooted cuttings. I've seen many gardeners skip this step and lose their progress.
Pro Tips for Grow A Magnolia Tree From A Cutting
- Here's what nobody tells you about successfully propagating magnolias from cuttings—these tricks make all the difference between success and disappointment.
- Timing is Everything: The best time to take your magnolia cuttings is during the late spring or early summer when new growth is just starting.
- Rooting Hormone Hack: While rooting hormone is optional, it significantly increases your success rate.
Frequently asked questions
about growing a magnolia tree from a cutting—because even the best gardeners need a little extra guidance! Here are answers to the most common queries to help you succeed.Can I grow a magnolia tree from any cutting, or do I need a specific type?
Not all magnolia cuttings root easily. Softwood cuttings (taken from new growth in spring/summer) work best, while semi-hardwood (late summer/fall) can also succeed. Avoid woody, mature branches—they’re too tough to root. Stick to healthy, flexible stems for the best results!
How long does it take for a magnolia cutting to root?
Patience is key! With the layered moisture trick, roots may appear in 4–12 weeks, but full root establishment can take 3–6 months. Check gently by tugging—if slight resistance feels present, roots are forming. Keep humidity high and avoid overwatering during this time.
What’s the best temperature for rooting magnolia cuttings?
Magnolias thrive in 65–75°F (18–24°C) during propagation. Avoid cold drafts or extreme heat, which can stress the cutting. A heating mat (set to 70°F/21°C) speeds rooting, while a clear plastic bag creates a cozy, humid microclimate—just remember to vent occasionally!
What if my magnolia cutting turns yellow or wilts?
Yellowing leaves or wilting often signal overwatering, low humidity, or root rot. Reduce watering, ensure drainage, and trim any mushy roots if present. Boost humidity with a mist bottle or pebble tray. If the cutting is still firm, it may recover—just adjust care!
Can I use this method for all magnolia varieties?
While the layered moisture trick works for many Magnolia species (like M. grandiflora or M. stellata), some evergreen types (e.g., Southern magnolias) root slower. Deciduous varieties (like saucer magnolias) often respond better. Test a few cuttings to see what thrives in your climate!
Pro Tip:
Label your cuttings immediately! Magnolia varieties can look alike, but M. 'Little Gem' and M. 'Ann' have different growth habits. A simple toothpick with the date and variety name saves future confusion.
Wrapping up and next steps
Growing a magnolia tree from a cutting is a rewarding journey that combines patience, care, and a little creativity—especially with the layered moisture trick to boost root development. 🌱 With the right tools, timing, and attention to humidity and soil conditions, you’ll soon watch those roots take hold and your cutting transform into a thriving young tree. Don’t let setbacks discourage you—every gardener faces challenges, but persistence pays off!
Now that you’re armed with the know-how, take the next step: pick a sunny spot in your yard, prepare the soil, and give your magnolia cutting the love it deserves. Before you know it, you’ll be admiring its fragrant blooms and sharing your success with fellow plant enthusiasts! 🌸