
Propagation
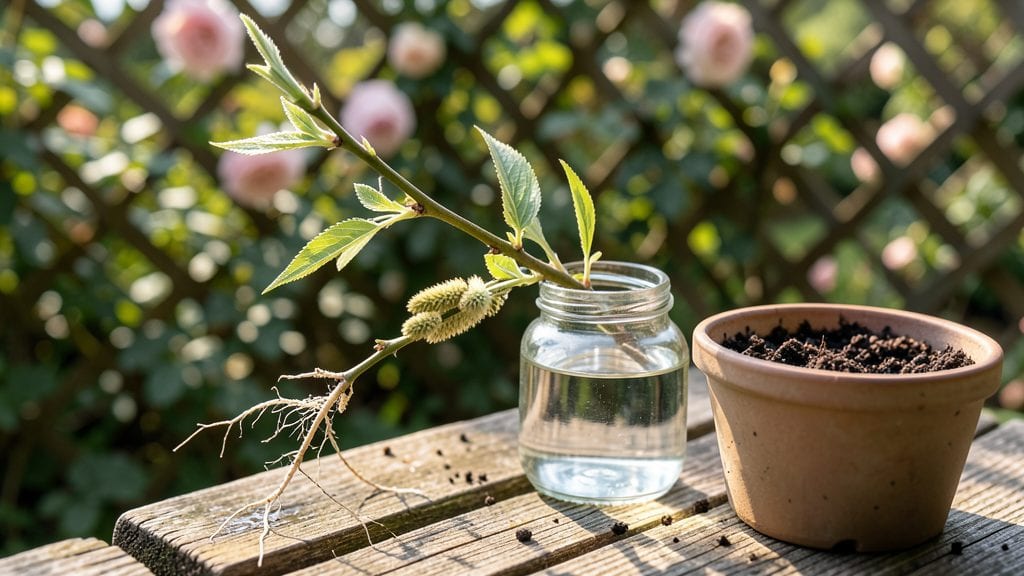
Growing a tree from a branch cutting is the ultimate freebie for gardeners—no nursery needed, just patience and the right technique. ✨ I’ve turned stubborn branches from my neighbor’s oak into thriving saplings using nothing but a sharp knife and a jar of water.
The best part? You can do this in spring, summer, or even early fall, depending on the tree type.
First, grab a healthy, pencil-thick branch with at least three buds (those little bumps where leaves grow). Cut it at a 45-degree angle just below a bud, then strip the lower leaves to expose fresh bark.
For rooting, you’ve got two options: water (the classic jar method) or soil (faster for some trees). I’ve had luck with both, but soil cuts down on transplant shock later.
In just 4-8 weeks, you’ll see roots forming—whether in water or soil—and those buds will start leafing out. The real magic happens when you plant it in the ground, where it’ll grow 3-4 times faster than a seedling.
No more waiting years for a mature tree; you’re skipping straight to the good stuff.
Here’s the kicker: 80% of failures come from one mistake—overwatering or using the wrong branch. I’ll show you exactly how to pick winners and avoid those rookie errors so your cutting thrives from day one. Ready to grow your own shade tree?
📚 In This Guide
- What you need
- Instructions
- Tips and common mistakes
- Wrapping up and next steps
What you need
- ● Healthy branch cutting: 4–6 inches long (½–1 inch in diameter), with at least 2–3 leaf nodes. Harvest from a disease-free, mature tree in late fall, winter, or early spring for best results.
- ● Rooting hormone: Powder or gel (e.g., Rootone or Clonex) to boost root growth—highly recommended for success!
- ● Well-draining potting mix: 1–2 gallons of a blend like perlite + peat moss or a cactus/succulent mix (sterilized to prevent fungus).
- ● Small pots or containers: 4–6 inch diameter, with drainage holes (e.g., plastic nursery pots or yogurt cups with holes poked in the bottom).
- ● Clear plastic bag or humidity dome: To create a greenhouse effect (e.g., a ziplock bag with a twist tie or a plastic propagator lid).
- ● Spray bottle: With water to mist cuttings and maintain humidity.
- ● Pruning shears or sharp knife: Sterilized with rubbing alcohol to make clean cuts.
- ● Watering can or spray bottle: For gentle hydration (avoid soaking the mix!).
- ● Heating mat: A seedling heat mat (set to 70–75°F) to speed up rooting in cooler months.
- ● Fertilizer: A diluted seaweed extract or fish emulsion (1/4 strength) after roots form (4–6 weeks).
- ● Label markers: To track cutting types (e.g., "Willow" or "Maple").
- ● Grow lights: If propagating indoors with low natural light (LED or fluorescent, 12+ hours/day).
- ● Moss (sphagnum): For moisture retention around cuttings (great for tropical species).
Step-by-step instructions for growing a tree from a branch cutting
Here’s my foolproof method to root cuttings and grow a full-sized tree from a single branch.
🌱 Step 1: Select and Prepare the Right Branch
Choose a healthy, pencil-thick branch with no flowers or fruit—you want all the plant’s energy focused on rooting. Cut a 4-6 inch section just below a leaf node (the bump where leaves attach) using clean, sharp pruners. I always sterilize my tools with rubbing alcohol first to prevent disease.
Strip the lower half of leaves, leaving only a few at the top. This reduces water loss while the roots form. If the branch is woody, make a small slit in the base with a knife to expose more cambium (the green layer under the bark)—this speeds up root growth.
💧 Step 2: Dip in Root Hormone and Plant
Dip the cut end into rooting hormone powder (or gel if you prefer) to encourage root development. Tap off excess so it doesn’t clump. Fill a small pot with moistened perlite or sand (I use perlite because it drains well and prevents rot). Stick the cutting 2-3 inches deep into the medium, pressing lightly to hold it in place.
Water gently until moisture seeps from the bottom drainage hole—this ensures the medium is evenly damp but not soggy. Place the pot in a warm, bright spot (like a sunny windowsill) but avoid direct midday sun, which can dry out the cutting too quickly.
☀️ Step 3: Create Humidity and Monitor Growth
Cover the pot with a clear plastic bag (like a gallon ziplock with holes punched in the top) to trap humidity. Check daily for condensation—if the inside fogs up, you’re golden. If it stays dry, mist the cutting and medium lightly. Roots usually form in 4-8 weeks, but some stubborn varieties take longer.
Watch for new leaves at the top—that’s your sign roots are developing. If the cutting wilts or yellows, it’s either too dry or too wet. I like to test moisture by sticking my finger in the medium: if it feels damp 1 inch down, you’re good.
🪴 Step 4: Transplant When Roots Form
Gently tug the cutting after 6-8 weeks. If you feel resistance (even slight), roots have formed. Plant it in a 4-6 inch pot with well-draining potting mix, burying the base up to the original leaf line. Water thoroughly and place it in bright, indirect light for a week to help it adjust.
After a month, gradually introduce it to outdoor conditions by moving it outside for 1-2 hours daily, increasing time over 2 weeks. Once it’s hardened off, plant it in the ground or a larger container. Mulch around the base to retain moisture and protect roots.
Tips & tricks for perfect tree propagation from branch cuttings
Here's what I've learned after years of trial and error with my own backyard experiments.
Timing Secret: The best time to take cuttings is in early spring when new growth begins—this is when the plant's energy is focused on growth rather than fruit or flowers. I've found that morning cuts work best because the plant has had a full night to hydrate, making the cutting more resilient. Avoid taking cuttings during extreme heat or cold, as these conditions stress the plant and reduce success rates.
Selection Tip: Look for branches that are pencil-thick (about 1/4 to 1/2 inch in diameter) with a smooth, healthy appearance. The branch should bend slightly without snapping—this indicates it's mature enough to root but not too woody. Confession: I skipped this step for years and wondered why so many of my early attempts failed. The right branch makes all the difference!
Rooting Strategy: For faster root development, consider using a rooting hormone gel instead of powder—it adheres better to the cutting and stays put. When planting, make sure the medium is moist but not soggy; I like to water until it seeps from the bottom drainage hole. This ensures even moisture without waterlogging, which can cause rot. Remember, the 4-8 week rooting timeframe is just a guideline—some varieties like willow root in as little as 2 weeks, while others may take up to 12 weeks.
Humidity Hack: Instead of using a plastic bag, I've had great success with a simple DIY humidity dome made from a clear plastic bottle cut in half. The larger size provides more stability and makes it easier to check on your cutting without disturbing the humidity. Just place the bottle over the pot and secure it with a rubber band. This creates a more stable environment than a ziplock bag and prevents accidental spills.
Pro Tips for Grow A Tree From A Branch Cutting
- Here's what I've learned after years of trial and error with my own backyard experiments.
- Timing Secret: The best time to take cuttings is in early spring when new growth begins—this is when the plant's ener...
- Selection Tip: Look for branches that are pencil-thick (about 1/4 to 1/2 inch in diameter) with a smooth, healthy app...
Frequently asked questions
Got questions about growing a tree from a cutting?
You’re not alone! Here are answers to the most common queries to help you succeed—no green thumb required.
Can I grow a tree from any branch cutting?
Not quite! Only softwood (new, flexible growth) or semi-hardwood (slightly woody but still green) cuttings root well. Avoid hardwood (thick, mature branches) or dried-out stems—they rarely take. Stick to healthy, disease-free branches for the best results!
How long does it take for roots to form?
Root development varies by species, but most cuttings sprout roots in 4–12 weeks if kept in ideal conditions (moisture, warmth, and indirect light). Patience is key—some tropical plants root faster (2–4 weeks), while fruit trees may take longer. Check for roots by gently tugging the cutting after 6 weeks!
What if my cutting rots instead of rooting?
Rotting is usually a sign of too much moisture or poor airflow. To fix it:
- Reduce watering—keep soil damp, not soggy.
- Ensure the cutting isn’t buried too deep (just 2–3 nodes under soil).
- Improve ventilation by spacing cuttings apart or using a fan lightly.
Can I grow a tree from a cutting in winter?
Winter is trickier because many plants are dormant, but semi-hardwood cuttings (taken in late fall) can still work! Use a heating mat or grow lights to maintain warmth (65–75°F). For hardwood cuttings (early winter), try the T-budding method or wait until spring. Layering (buried branches) is another winter-friendly hack!
Is it cheaper to buy a sapling or grow from a cutting?
Growing from a cutting is free if you have a mature tree, but success isn’t guaranteed. Buying a sapling ensures a healthy start (~$5–$20), while failed cuttings may cost you time and soil. For rare or expensive trees (e.g., fruit varieties), cuttings can save money—just be patient and precise!
Will the new tree look like the parent tree?
Yes! Trees grown from cuttings are genetically identical to the parent (clones). This is why gardeners use cuttings for prized varieties like roses or citrus. However, grafted trees (common in nurseries) may have different scions—so if you want exact replicas, stick to cuttings!
Wrapping up and next steps
Growing a tree from a branch cutting is a rewarding journey that connects you to nature’s magic—and you’ve got all the tools to succeed! 🌱 Whether you’re a beginner or a seasoned gardener, patience and care will turn that simple cutting into a thriving sapling.
Once your new tree takes root, why not expand your green thumb? Try propagating more plants, experimenting with different species, or even sharing your knowledge with fellow plant lovers.
Now grab those shears, get growing, and watch your backyard transform—one cutting at a time! 🌳✨