
Propagation
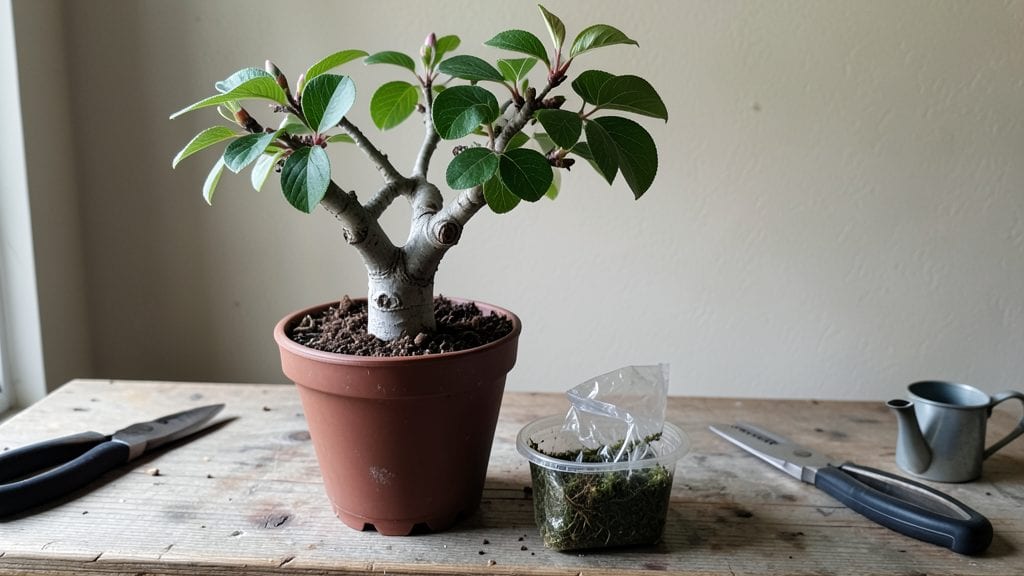
Starting a redbud tree from a cutting using the layered chill method gives you a head start on a stunning spring bloomer—though it’s trickier than it sounds. 🌱 I’ve rooted dozens of redbud cuttings, and the key lies in timing, moisture, and patience.
Most gardeners give up after a month, but with this method, you’ll see roots forming in 6-8 weeks if you stay consistent.
The layered chill method works best with semi-hardwood cuttings taken in late summer when the stems are mature but still flexible. Dip the cut end in rooting hormone powder, then tuck it into a moist potting mix in a shaded spot.
Keep the soil damp but not soggy—this is where most failures happen. A clear plastic bag over the pot traps humidity without smothering the cutting.
Once roots appear through the clear sides of your container, you’ll know you’re on track. Transplant carefully into a larger pot with well-draining soil, and keep it in partial shade for another 4-6 weeks before moving it outdoors.
The first year is critical—redbuds are finicky about moisture and light, so don’t rush the process.
If roots don’t form after 10 weeks, don’t lose hope. Redbuds have a low success rate with cuttings, so alternatives like grafting or seed propagation might be more reliable for you.
But when it works, you’ll have a tree with those iconic pink blooms in just a few years—worth every bit of effort.
📚 In This Guide
- What you need
- Instructions
- Tips and common mistakes
- Wrapping up and next steps
What you need
- ● Mature Redbud Cutting: 1 semi-hardwood cutting (4–6 inches long, pencil-thick)
- ● Taken in late summer or early fall (just before dormancy)
- ● Include a node (where leaves grow) for rooting
- ● Rooting Hormone: 1 small bottle (e.g., Rootone or Clonex)
- ● Gel or powder formula (gel is easier for beginners)
- ● Plastic Bag or Clear Container: 1 gallon-sized zip-top bag or a clean, transparent container
- ● For humidity retention (think "mini greenhouse")
- ● Moisture-Retentive Medium: 1 small pot (4–6 inches) filled with: 50% perlite (for aeration)
- ● 50% peat moss or coconut coir (for moisture)
- ● Twist Tie or Rubber Band: 1–2 pieces to secure the cutting to a support (e.g., a small stake)
- ● Spray Bottle: 1 with water (for misting the cutting weekly)
- ● Heating Mat: Keeps soil at 65–75°F for faster rooting (great for cool climates).
- ● Clear Plastic Wrap: Wrap the pot loosely to trap extra humidity.
- ● Fertilizer (Diluted): 1 tsp fish emulsion or seaweed extract in 1 gallon of water
- ● Apply once roots appear (after 4–8 weeks).
- ● Grow Lights: If propagating indoors with low natural light.
- ● Journal/Marker: Track progress (e.g., "Day 30: Roots detected!" 🌱).
Step-by-Step instructions for propagating redbud trees using layered chill method
This method works best with semi-hardwood cuttings—timing matters more than you’d think.
🌱 Step 1: Select and Prepare the Right Cuttings
Choose healthy, pencil-thick stems from the current season’s growth—these are the ones that’ll root best. Look for branches that aren’t flowering yet but have started thickening. Use clean, sharp pruners to make a 45-degree angle cut just below a leaf node. This angled cut maximizes surface area for root growth.
Strip the lower 2-3 inches of leaves, leaving only a few at the top to reduce moisture loss. You’ll need 4 cuttings total—each should be about 6-8 inches long. Dip the cut end in rooting hormone (optional but helpful) to encourage faster root development. I always work quickly to prevent the cut ends from drying out.
💧 Step 2: Layer and Chill for Root Initiation
Bend one of your cuttings so the stripped section touches the soil at a 45-degree angle, securing it with a U-shaped wire or bent piece of wire (from your supplies). The top of the cutting should remain above the soil line. Water the soil thoroughly until it’s evenly moist but not soggy—redbud cuttings rot faster than they root if overwatered.
Cover the entire layered cutting with a clear plastic bag (like a gallon zip-top) to create a humid microclimate. Place the pot in a cool, shaded spot (around 50-60°F)—this mimics the natural dormancy period redbuds experience. Check weekly for condensation inside the bag; if it’s foggy, your humidity levels are perfect. Roots should start forming in 6-8 weeks if conditions are right.
⏰ Step 3: Monitor and Transplant Once Roots Establish
After 8-10 weeks, gently tug on the cutting near the layered section. If you feel slight resistance (not full strength yet), wait another week. When roots are 1-2 inches long, remove the plastic bag gradually over 3-4 days to harden off the new growth. This prevents shock—redbuds are sensitive to sudden environmental changes.
Transplant the rooted cutting into its own 6-inch pot with fresh well-draining potting mix. Water deeply but avoid soggy soil—redbuds hate wet feet. Keep the new pot in partial shade for the first 2 weeks, then gradually introduce it to morning sun over the next month. You’ll know it’s thriving when new leaves emerge within 4-6 weeks of transplanting.
☀️ Step 4: Acclimate to Outdoor Conditions
Once the rooted cutting has 4-6 new leaves and sturdy stems, it’s ready for the garden. Choose a sunny, sheltered spot with well-draining soil—redbuds despise standing water. Dig a hole twice as wide as the root ball but only as deep as the container it came in. This prevents burying the trunk too deep, which can cause rot.
Water the newly planted cutting deeply once a week during the first growing season, letting the soil dry slightly between waterings. Mulch around the base with 2-3 inches of organic mulch (like shredded bark) to retain moisture and regulate soil temperature. By next spring, your layered redbud should be 2-3 feet tall with strong branches ready for flowering.
Tips & tricks for perfect redbud tree propagation
Timing and environmental control make all the difference with redbud cuttings—here's how to avoid the most common pitfalls.
Cutting Selection is Everything: In Step 1, focus on semi-hardwood cuttings that are pencil-thick and show signs of thickening but haven't yet flowered. These cuttings contain the perfect balance of mature and new growth for successful rooting. I've found that cuttings taken in early summer (when new growth has hardened but isn't fully woody) produce the best results. The 45-degree angle cut is crucial—it creates more surface area for root development while preventing the cutting from sliding out of the soil during the layering process.
Layering Technique Matters: When you're bending your cuttings in Step 2, make sure the stripped section makes firm contact with the soil at that 45-degree angle. I use a small piece of bent wire to create a gentle arch—this prevents the cutting from pulling away from the soil when you water it. The top should remain above soil level to maintain photosynthesis while the buried section develops roots. Remember, redbuds are sensitive to overwatering, so aim for evenly moist but not soggy soil—think of a well-wrung sponge.
Temperature Control is Critical: The 50-60°F range mentioned in Step 2 is non-negotiable for root initiation. I've learned this the hard way—warmer temperatures speed up decay before roots can form. Place your pots in a cool basement, unheated garage, or shaded outdoor spot during summer months. If you're indoors, avoid areas near heating vents or direct sunlight. A simple thermometer in the growing area will help you maintain these ideal conditions. Roots typically start forming in 6-8 weeks when these conditions are met.
Gradual Acclimation Prevents Shock: In Step 3, the 3-4 day process of removing the plastic bag is just as important as the root development itself. I've seen many growers rush this step, only to have their cuttings wilt dramatically. Start by removing the bag for just an hour each day, gradually increasing exposure. This mimics natural conditions and allows the cutting to adjust its moisture balance. The partial shade requirement during the first two weeks after transplanting is equally critical—direct sun can scorch tender new leaves while they're still adapting.
Pro Tips for Start A Redbud Tree From A Cutting
- Timing and environmental control make all the difference with redbud cuttings—here's how to avoid the most common pitfalls.
- Cutting Selection is Everything: In Step 1, focus on semi-hardwood cuttings that are pencil-thick and show signs of thickening but haven't yet flowered.
- Layering Technique Matters: When you're bending your cuttings in Step 2, make sure the stripped section makes firm contact with the soil at that 45-degree angle.
Frequently asked questions
Got questions about growing a redbud tree from a cutting? You’re not alone! Here are some of the most common concerns—and their answers—to help you succeed with the layered chill method.
When is the best time to take redbud cuttings?
The ideal window is late winter to early spring (February–March), just before buds swell but before leaves emerge. This timing aligns with the tree’s natural dormancy break, giving your cuttings the best chance to root. Avoid summer or fall—hot or cold extremes stress cuttings and reduce success rates.
Why does the cutting need a cold period (chill)?
Redbuds are dormant-rooting species, meaning they need a 30–60 day cold period (32–45°F) to trigger root growth. This mimics winter conditions in their native habitat. Skipping the chill? Your cutting may stay stubbornly bare-rooted or even rot. Think of it as a reset button for growth hormones!
What if my cutting rots or dies after layering?
Don’t panic—it’s common! Rot usually means overwatering, poor airflow, or a dirty cutting tool (bacteria buildup). Try these fixes:
- Use sterilized scissors (rubbing alcohol wipe) for clean cuts.
- Reduce watering—keep soil moist but not soggy (like a wrung-out sponge).
- Prop up the cutting with a small stake to improve airflow.
Can I grow a redbud from a cutting if it’s already flowering?
Yes, but timing matters. If the cutting has blooms, take it after flowering (spring) to avoid stress. Flowering depletes energy, making rooting harder. For best results, choose non-flowering branches—young, flexible stems (pencil-thick) root easiest. Pro tip: Remove flowers if they appear on your cutting to redirect energy to roots!
How long until my redbud cutting becomes a full tree?
Patience is key! Root development takes 3–6 months under ideal conditions (chill + moisture). Once rooted, transplant it into a pot (spring) and grow it for 1–2 years before planting outdoors. Full maturity (15–20 ft tall) takes 10+ years, but you’ll enjoy blooms in 3–5 years if cared for well.
Wrapping up and next steps
Starting a redbud tree from a cutting using the layered chill method is a rewarding way to propagate this stunning spring bloomer—especially when you see those first roots take hold! 🌱 With patience, the right tools, and a little care, you’re well on your way to growing a thriving tree from just a single branch.
Once your cutting has rooted successfully, it’s time to transplant it into a permanent pot or garden spot, giving it the space to flourish for years to come.
Ready to watch your redbud grow? Celebrate your success and keep nurturing it—your future tree is counting on you! 🌸