
Pruning
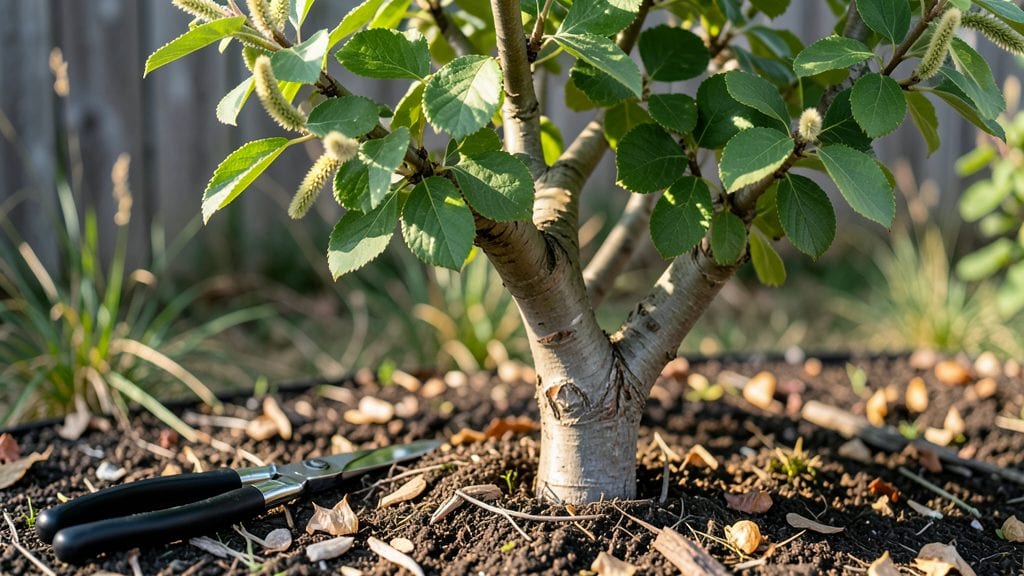
Pruning hazelnut trees the right way turns a tangled mess into a productive orchard. 🌱 I’ve watched my own trees go from scraggly to thriving after learning the simple cuts that boost nuts and health—no guesswork required.
The key isn’t just timing but knowing which branches to keep and which to remove for airflow and sunlight.
Start with the right tools: clean, sharp pruners for small branches and a pruning saw for thicker wood. Young trees need shaping to encourage strong structure, while mature trees benefit from thinning to improve nut production.
I’ve found that pruning in late winter—just before buds swell—gives the best results, but summer pruning can also help control growth.
You’ll see fewer broken limbs, more sunlight reaching the center, and a noticeable increase in nut-bearing branches within a season. The trees reward patience with heavier harvests and fewer pests. Plus, it’s satisfying to step back and admire the open, airy shape you’ve created.
Works for both backyard orchards and larger groves, though timing varies slightly by climate zone. Here’s how to get started without overcomplicating it—your trees will thank you.
📚 In This Guide
- What you need
- Instructions
- Tips and common mistakes
- Wrapping up and next steps
What you need
- ● Pruning shears: Bypass pruners (4-6" blades) for small branches (1/4"–3/4" thick). Sharpness is key!
- ● Loppers: 1 pair (8-12" blades) for medium branches (3/4"–2" thick). Look for ratchet-style for extra leverage.
- ● Pruning saw: 1 handheld saw (8–10" blade) for thick branches (2"+). Curved-tooth blades prevent tear-out.
- ● Extension pole: 1 (6–10 ft) with saw attachment for high branches. Saves your back!
- ● Gloves: 1 pair of cut-resistant gloves (e.g., leather or synthetic mesh).
- ● Safety glasses: 1 pair to shield eyes from debris.
- ● Disinfectant: 70% isopropyl alcohol or copper-based pruning spray (1 bottle) to sterilize tools between cuts.
- ○ Pruning sealant: Optional but helpful for large cuts (>2" diameter). Use tree wound paint (e.g., Tanglefoot or similar).
- ● Tarp or drop cloth: 1 (4’x6’ or larger) to collect debris and protect the ground.
- ● Marking twine or tape: For flagging branches to remove (if planning ahead).
- ● Ladder: 1 sturdy extension ladder (16–24 ft) for tall trees. Never stand on wobbly ladders!
- ● First-aid kit: Basic kit with bandages and antiseptic (for minor cuts or scrapes).
- ● Weather check: Prune on a dry, calm day (avoid wind or rain).
- ● Tree knowledge: Identify main scaffold branches (5–7 primary limbs) and water sprouts (vigorous vertical shoots).
- ● Safety brief: Wear closed-toe shoes and avoid loose clothing.
- ● Timing: Best times: Late winter/early spring (dormant season) or summer after harvest.
Step-by-step guide to pruning hazelnut trees
Here's the method I use to keep my hazelnut trees thriving and productive—no guesswork, just clear steps.
✂️ Step 1: Prune in Late Winter for Structural Health
Start pruning your hazelnut trees in late winter (just before buds swell) when the tree is still dormant. This timing prevents disease spread and gives you a clear view of the tree's structure. I always begin by removing dead, diseased, or crossing branches—these are your first targets because they drain energy from the tree.
Use clean, sharp pruning shears to make cuts just outside the branch collar (the swollen area where the branch meets the trunk). Avoid leaving stubs, as they invite rot and pests. For branches thicker than ½ inch, switch to a pruning saw for clean cuts. Remember, hazelnut trees are resilient, so don’t overdo it—aim to remove no more than 25% of the canopy in one session.
☀️ Step 2: Thin the Canopy for Better Airflow and Light
Next, focus on thinning the canopy to improve airflow and sunlight penetration. Look for branches that rub against each other or grow inward—these compete for resources and can damage each other over time. Remove one of the two if they’re crossing, always choosing the weaker or smaller branch.
I also target water sprouts (fast-growing, vertical shoots) and suckers (shoots growing from the base or roots). These saplings steal energy from productive branches, so prune them back to the main stem or remove them entirely. After thinning, step back and visualize sunlight reaching the center of the tree—this is your goal.
🌿 Step 3: Shape the Tree for Optimal Nut Production
Hazelnut trees produce nuts on older wood, so avoid heavy pruning of mature branches. Instead, focus on light shaping to maintain an open center. Remove excessive growth from the lower third of the tree to encourage stronger branches higher up, where sunlight is abundant.
For young trees, prune to encourage a strong central leader (main upright stem) with well-spaced branches. Older trees benefit from selective pruning to remove overcrowded or weak branches. I like to leave 3-4 main scaffold branches evenly spaced around the trunk—this balances growth and nut production.
⏰ Step 4: Summer Pruning for Maintenance and Pest Control
In early summer, do a quick check for any new growth that’s out of place or looks unhealthy. Prune only what’s necessary—this is a light maintenance pass, not a major overhaul. Remove any branches that show signs of pest damage (like holes or sawdust-like frass) or disease (yellowing leaves, black spots).
I also trim back any shoots growing from the base (suckers) or sprouts growing from the trunk (epicormic branches). These compete with the main tree for nutrients and can weaken nut production. Use sterilized pruners to avoid spreading disease, and dispose of pruned material promptly.
✂️ Step 5: Clean Up and Prepare for Next Year
After pruning, clean up the area—remove all pruned branches and leaves from the base of the tree. This reduces hiding spots for pests and diseases. I also sterilize my tools with rubbing alcohol or a bleach solution (1 part bleach to 9 parts water) to prevent cross-contamination.
Finally, mark the tree with a small flag or paint if you’re unsure about future pruning spots. This helps you track progress and avoid over-pruning in the next session. Hazelnut trees reward patience—consistent, careful pruning over the years leads to healthier trees and bigger harvests.
Tips & tricks for perfect pruning hazelnut trees
Here's what I've learned over years of pruning my hazelnut grove—these tricks make all the difference between a healthy tree and one struggling to produce nuts.
Timing is Everything: Late winter pruning (just before buds swell) gives you the clearest view of the tree's structure. I've seen trees that missed this window develop fungal issues because the cuts took too long to heal. If you absolutely must prune outside this window, wait until early summer—but avoid pruning during active growth periods when the tree is most vulnerable to disease.
Tool Precision Matters: Never use dull pruning shears—they tear rather than cut cleanly, creating larger wounds that invite pests and disease. I keep a small file in my tool bag to sharpen blades between uses, and always switch to a pruning saw for branches thicker than ½ inch. The cleanest cut heals fastest, which is especially important for hazelnut trees that produce nuts on older wood.
Visualize the Sunlight: After thinning, step back and imagine sunlight streaming through the center of the tree. I've pruned trees where I could reach into the center without touching branches—this is the goal. For young trees, aim for that strong central leader with branches spaced about 12-18 inches apart. Older trees need that open center to prevent fungal issues and encourage nut production on the outer branches.
Mark Your Progress: Use small flags or paint marks to tag branches you're unsure about. I've used bright orange paint to mark branches I want to remove in the next pruning session—this helps me track progress over multiple years. The key is consistency; hazelnut trees respond best to gradual, thoughtful pruning rather than drastic annual cuts.
Pro Tips for Pruning Hazelnut Trees
- Here's what I've learned over years of pruning my hazelnut grove—these tricks make all the difference between a healthy tree and one struggling to produce nuts.
- Timing is Everything: Late winter pruning (just before buds swell) gives you the clearest view of the tree's structure.
- Tool Precision Matters: Never use dull pruning shears—they tear rather than cut cleanly, creating larger wounds that invite pests and disease.
Frequently asked questions
When is the best time to prune hazelnut trees?
The ideal time to prune hazelnut trees is late winter or early spring (just before buds swell) to avoid disease spread. Avoid pruning in fall—this can invite pests like Eastern filbertworm. Light pruning can also occur in summer to remove dead wood, but major shaping should wait for dormancy.
How much can I cut back a hazelnut tree in one year?
Never remove more than 20-25% of the tree’s canopy in a single year. Over-pruning stresses the tree, reducing yield and inviting disease. Young trees (under 5 years) need minimal pruning—focus on removing dead or crossing branches. Mature trees benefit from gradual thinning to improve airflow and light penetration.
What if I see bleeding sap after pruning?
Bleeding sap (a watery, clear fluid) is normal in early spring and harmless—it’s the tree’s way of expelling excess moisture. To minimize it, prune on dry, cool days (not warm or rainy). If sap turns dark or foul-smelling, it may signal disease; disinfect tools with rubbing alcohol and remove infected branches immediately.
Can I prune hazelnut trees without specialized tools?
Basic hand pruners work for small branches (<1 inch thick), but for thicker limbs, invest in bypass pruners or a pruning saw. Loppers help with mid-sized branches. Always disinfect tools between cuts to prevent bacterial spread. Avoid hedge trimmers—they tear wood, inviting disease.
How do I encourage more nuts after pruning?
Prune to open the canopy: Remove suckers (shoots at the base) and water sprouts (vertical shoots) to redirect energy to nut production. Thin out crowded branches to improve air circulation, which reduces mold and boosts pollination. Fertilize lightly with nitrogen-rich compost post-pruning for recovery.
Wrapping up and next steps
Pruning your hazelnut trees is a rewarding way to ensure bigger harvests and longer lifespan for your grove!
By following seasonal best practices—whether it’s opening the canopy in winter or thinning out crowded branches in summer—you’ll encourage healthier growth and more abundant nuts. Don’t let hesitation hold you back: grab those pruners and start shaping your trees today!
Ready to take the next step? Mark your calendar for your first pruning session—spring is just around the corner! 🌱 For extra confidence, revisit our FAQ section or consult a local orchard expert. Happy pruning!