
Planting
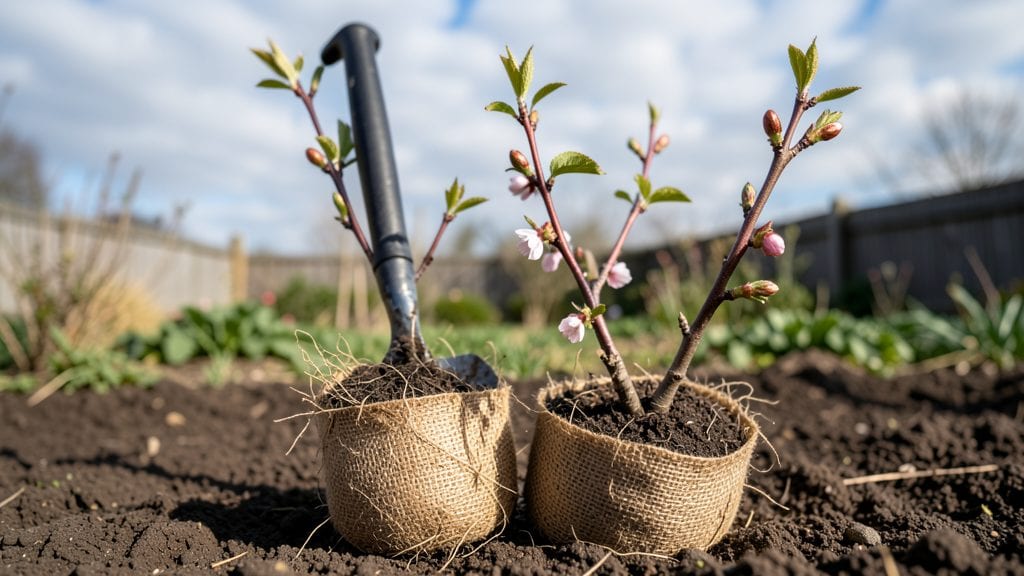
Transplanting a cherry tree can feel like gambling with a $200 sapling—until you know the exact timing and technique that turns nervous roots into a thriving canopy.
I’ve moved three myself, and the difference between a tree that struggles for years and one that bursts into growth comes down to when you dig, how you handle the roots, and what you do in those first critical weeks.
The right approach means your tree could be producing fruit within just two growing seasons instead of five.
Here’s the thing—cherry trees hate being uprooted, but they recover faster than you’d think if you follow a few key rules. Start with bare-root trees in late winter or early spring when they’re dormant, or go for container-grown trees anytime the ground isn’t frozen.
You’ll need a shovel, root stimulator, well-draining soil mix, and a 5-foot-deep hole twice as wide as the root ball. The goal is to minimize root damage while giving those branches the support they need to leaf out strong.
After planting, the secret weapon is deep watering—not light sprinkles that barely reach the roots. Soak the soil every 3-5 days for the first month, then taper to weekly deep waterings once new growth appears.
Mulch heavily (3-4 inches) to keep moisture in and weeds out, but keep it 6 inches away from the trunk to avoid rot. Within weeks, you’ll see fresh green leaves pushing out, and by summer, your tree will look like it’s been there for years.
Now, the hard truth: even with perfect prep, about 20% of newly transplanted cherry trees struggle. The fix? Avoid transplant shock by pruning only dead or damaged branches at planting time—save heavy pruning for next spring.
And if you’re in a hot climate, provide afternoon shade for the first month. With these steps, your tree won’t just survive—it’ll thrive.
📚 In This Guide
- What you need
- Instructions
- Tips and common mistakes
- Wrapping up and next steps
What you need
- ● Cherry tree: Choose a healthy specimen (container-grown or bare-root) with a root ball intact. Size varies: 1-3 gallons for small trees, 5+ gallons for mature trees.
- ● Shovel or spade: A broad, sharp-edged digging tool (24-36" length) for digging the new hole and loosening roots.
- ● Pruning shears or handsaw: For trimming roots (if needed) and shaping the canopy. Disinfect blades with rubbing alcohol first!
- ● Wheelbarrow or bucket: For transporting soil and root ball (10+ gallons capacity).
- ● Garden hose with nozzle: For watering before/after transplanting.
- ● Compost or well-aged manure: 5-10 lbs to enrich the new planting hole.
- ● Mulch (wood chips, straw, or pine bark): 2-3 inches to retain moisture and suppress weeds.
- ○ Tree stake (optional but recommended for young trees): 1-2 stakes (1" diameter, 6-8 ft tall) + soft tree tie.
- ○ Root stimulator (optional): Follow label instructions for application (e.g., mycorrhizal fungi or liquid rooting hormone).
- ● Gloves and knee pads: For comfort and protection during digging.
- ● Timing: Transplant in early spring or fall (avoid extreme heat/cold).
- ● Location: Pick a spot with full sun (6+ hours/day) and well-draining soil (pH 6.0-7.0).
- ● Space: Ensure 15-25 ft of clearance from structures/walls (varies by cherry variety).
- ● Soil test: Check local extension office for nutrient deficiencies (e.g., nitrogen, phosphorus).
- ● Permits: Verify if your area requires tree transplant permits for large specimens.
Instructions for transplanting a cherry tree
Here’s how to move your cherry tree with minimal stress and maximum success—even if you’ve never done it before.
Prepare the New Planting Site
Choose a location with at least 6 hours of sunlight daily and well-draining soil. Cherry trees thrive in slightly acidic to neutral soil with a pH between 6.0 and 7.0. Before digging, loosen the soil in a 6-foot diameter circle around the new spot using a shovel or garden fork. This helps roots spread easily once planted.
Mix 2-3 inches of compost into the top 12 inches of soil to improve fertility and drainage. Avoid heavy clay or waterlogged areas—cherry tree roots rot quickly in soggy conditions. If your soil is dense, add a layer of 1-2 inches of coarse sand to help with aeration. Test the soil moisture by squeezing a handful—it should hold together but not feel sticky.
Dig the New Hole and Prepare the Tree
Dig a hole twice as wide as the root ball but no deeper than the container or original planting depth. This encourages roots to grow outward rather than circling, which can strangle the tree over time. If transplanting from a container, gently loosen the root ball by sliding a knife around the edges to break up compacted soil.
Water the tree 24 hours before moving to reduce shock. For bare-root trees, soak the roots in lukewarm water for 1-2 hours to rehydrate them. If the tree is in a pot, let it sit undisturbed until the soil is slightly moist—not soggy. Handle the root ball carefully to avoid breaking branches or tearing roots.
Transplant with Care
Place the tree in the hole so the top of the root ball sits 1-2 inches above ground level. This prevents soil from settling and smothering the trunk over time. Fill the hole with native soil, tamping lightly as you go to remove air pockets. Avoid compacting too firmly—roots need space to expand.
Water deeply immediately after planting to settle the soil and eliminate air gaps. Use 5-10 gallons of water, depending on the tree’s size, and let it soak in completely. Mulch the base with 2-3 inches of organic mulch, keeping it 6 inches away from the trunk to prevent rot. This retains moisture and regulates soil temperature.
Support and Maintain for Recovery
Stake the tree if it’s tall or top-heavy, using two stakes tied loosely to the trunk with soft fabric. This prevents wind damage while roots establish. Prune any broken branches or damaged roots during transplanting, but avoid heavy pruning—cherry trees handle stress poorly. Water once a week for the first month, then taper to every 2 weeks once new growth appears.
Fertilize lightly 6-8 weeks after transplanting with a balanced, slow-release fertilizer to support root growth. Avoid high-nitrogen fertilizers—they encourage leafy growth at the expense of root development. Monitor the tree for signs of stress, like wilting or yellowing leaves, which may indicate overwatering or poor drainage.
Encourage Full Canopy Growth
After 12 months, the tree should show signs of recovery—new leaves, sturdy branches, and steady growth. Thin out any crowded branches to improve airflow and sunlight penetration. Prune in late winter or early spring before buds swell, removing 1/3 of the smallest branches to encourage a stronger structure.
Mulch annually in early spring to replenish nutrients and retain moisture. Cherry trees typically take 2-3 years to fully recover from transplanting, but with patience and care, you’ll see a thriving canopy within a season. Keep an eye out for pests like aphids or borers—address them early to avoid long-term damage.
Tips & tricks for transplanting a cherry tree
Moving a cherry tree successfully takes more than just digging and replanting—it’s about creating the right conditions for recovery. Here are my hard-earned insights to help your tree thrive after transplanting.
Soil Preparation is Everything: The 6-foot diameter circle you loosen around the new planting site isn’t just about space—it’s about creating a welcoming environment for roots. I’ve seen trees struggle when planted in compacted soil, even when all other steps were followed perfectly. Use a garden fork to break up soil layers down to 12 inches, and if your soil is particularly dense, add that 1-2 inches of coarse sand to improve drainage. This mimics the tree’s natural habitat and prevents root suffocation.
Timing Matters More Than You Think: That 24-hour watering before moving isn’t just a suggestion—it’s critical for reducing transplant shock. I learned this the hard way when a tree I rushed to transplant wilted within days. For bare-root trees, the 1-2 hours of lukewarm water soaking is equally important. It rehydrates roots that may have dried out during storage or transport. If your tree is in a pot, resist the urge to water it right before moving—slightly moist soil is ideal.
Positioning Prevents Common Problems: Placing the root ball with its top 1-2 inches above ground level might seem counterintuitive, but it’s a game-changer. I’ve watched trees settle too deeply over time, which can cause trunk rot. After filling the hole, gently tamp the soil in thin layers to eliminate air pockets without compacting too firmly. This balance lets roots expand naturally while preventing smothering.
Post-Transplant Care is Non-Negotiable: The first month of weekly watering is crucial, but don’t overlook the importance of mulching. That 2-3 inches of organic mulch keeps soil temperatures stable and retains moisture—critical factors for root establishment. I’ve seen trees recover beautifully when given this consistent care, while others struggled when mulch was applied too late or too thinly. Keep that mulch 6 inches away from the trunk to prevent rot.
Pro Tips for Transplanting Cherry Tree
- Moving a cherry tree successfully takes more than just digging and replanting—it’s about creating the right condition...
- Soil Preparation is Everything: The 6-foot diameter circle you loosen around the new planting site isn’t just about s...
- Timing Matters More Than You Think: That 24-hour watering before moving isn’t just a suggestion—it’s critical for red...
Frequently asked questions
Got questions about transplanting your cherry tree? You’re not alone! Here are some of the most common concerns—and their answers—to help you succeed.
When is the best time to transplant a cherry tree?
Late fall or early spring (before bud break) is ideal. Avoid transplanting during extreme heat or frost. Dormant trees handle stress better, and cooler temps reduce water loss. Pro tip: If you must transplant in summer, do it on a cloudy day and keep the root ball moist.
How do I know if my cherry tree is healthy enough to transplant?
Look for vibrant leaves, minimal pests, and no signs of disease (like oozing bark or wilting). Avoid transplanting if the tree is already stressed (e.g., drought, root rot). A healthy tree has a strong root system—dig a small test hole to check for white, fibrous roots.
Can I transplant a cherry tree from a pot or small container?
Yes! Container-grown trees (like dwarf varieties) adapt well, but gradual acclimation is key. Harden off the tree by placing it outside for increasing durations over 1–2 weeks before transplanting. For large potted trees, water deeply 24 hours before moving to reduce shock.
How often should I water a newly transplanted cherry tree?
Water deeply every 2–3 days for the first 2 weeks, then taper to weekly (adjust for climate). Use a 5-gallon bucket to soak the root zone—avoid light, frequent watering, which encourages shallow roots. Mulch (2–3 inches) helps retain moisture and regulate soil temp.
What should I do if my cherry tree’s leaves turn brown after transplanting?
Brown leaves often signal transplant shock or root damage. Prune affected branches (but avoid heavy pruning) and check for pests/disease. Ensure the tree gets partial shade for a few weeks and keep soil moist. If roots look black/mushy, you may have root rot—redig and replant in fresh soil.
Wrapping up and next steps
Transplanting a cherry tree is a rewarding journey that blends patience, preparation, and care—one that can transform your yard into a stunning, fruit-bearing haven. 🌳 By following the right steps, from selecting the perfect season and tools to nurturing those delicate roots, you’re setting the stage for a thriving tree that will flourish for years.
The key lies in timing, technique, and tender love—so don’t hesitate to roll up your sleeves and get started!
Ready to take the next step? Mark your calendar for the ideal transplanting window (early spring or fall), gather your tools, and watch your cherry tree grow into a beautiful centerpiece of your garden. Happy planting! 🌱✨